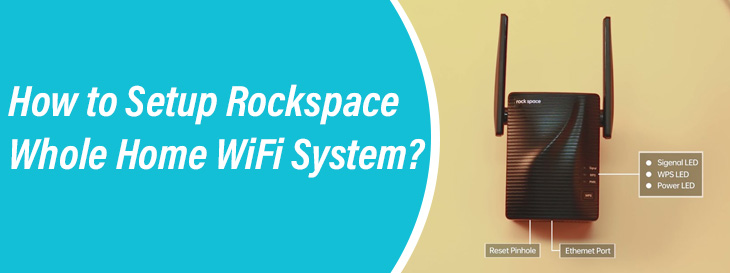
How to Setup Rockspace Whole Home WiFi System?
Rockspace home WiFi system help you connect to the internet from any corner of your house. Due to this reason – 99.99 users has already switch to Rock space WiFi extender. All the user needs to do is to set the extender up and enjoy continuous internet access throughout their home. So, you might be wondering how to setup Rock space WiFi system, aren’t you? If yes, this blog will help you.
Methods to Setup Rockspace WiFi Extender
There are two easy methods to set up Rockspace WiFi extender:
- One: Using the manual method
- Two: Using the WPS method
In the upcoming section – you will get instructions to perform Rockspace extender setup using both – WPS and the manual method. Read on!
How to Setup Rock Space Whole Home WiFi System [WPS Method]
- First things first, plug in your Rockspace WiFi extender next to your router.
Do not panic if you don’t have two wall plugs closer. You can install a one by simply calling up your electrician.
- Wait till the extender’s power LED turns solid blue.
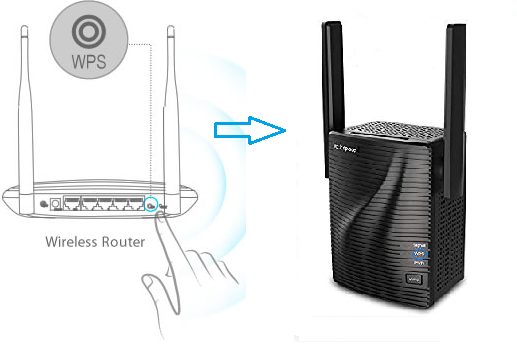
- If your router has the WPS button, first press the WPS button on it, and wait for two minutes.
- Now, press the Rockspace extender’s WPS button.
- Wait till the extender’s signal LED turns solid blue. It indicates a successful connection between your Rockspace device and your host router.
By implementing the instructions outlined above – you can set up your Rockspace WiFi extender using the WPS method.
How to Setup Rockspace Whole Home WiFi System [Manual Method]
If the above-mentioned method fails or your host router lacks a WPS button, then you can use your mobile phone for setting up the extender.
- First and foremost – turn off your mobile and connect it to the WiFi network of your Rockspace extender i.e. Rockspace_ext. Once you are connected, head over to the next step.
- Open an internet browser – enter 192.168.0.254. This is the default IP of your Rockspace extender and it can be found on the back panel of your Rockspace extender.
- Thereafter, create a strong password for future login and Rockspace extender management and tap Next.
- Select the WiFi network, whose range you wish to extend and type the password, and tap extending.
- Wait until the page shows “extended successfully”. WiFi network name (SSID) ending with _EXT or 5GEXT are the extended networks.
Remember that – by default – the password of the extended network is the same as of your existing router’s network.
And, there you are! You can now move your Rockspace WiFi extender halfway between your router, and the WiFi dead zone.
Make sure that the Rockspace extender’s signal LED stays blue. On the off chance, the extender’s signal LED doesn’t turns blue – relocate the extender closer to router till the signal LED turns blue.
Reset Rockspace WiFi Extender
In the event – you face Rockspace extender setup or WiFi connectivity issues – you can reset the extender and the router.
To do so:
Switch on the extender and with the help of paper clip or– press and hold the reset hole gently for 8-10 seconds. Once done – reset your host router as well. What happened? Unsure about how to reset your router? Yes? Well, you can call your network provider for assistance.
In a Nutshell
If you want to enjoy WiFi extended signals everywhere in your home – switch to Rockspace WiFi extender. The reason is – this is the only device that is capable of providing stable internet connectivity without signal drop throughout your home.
Our blog post on how to setup Rockspace whole home WiFi system ends here. Anticipating that the 2 methods along with their instructions we have provided above will help you perform Rockspace WiFi extender setup process in a hassle-free manner. If your answer is yes, then with the hope of helping you setup the extender, we are warping up our piece of writing.